← Back to Home

Support & User Guide

New here? Start with "Getting Started" and you'll be up and running in a minute. Already browsing? Jump to any section below for step-by-step help.

What is BSV Browser?

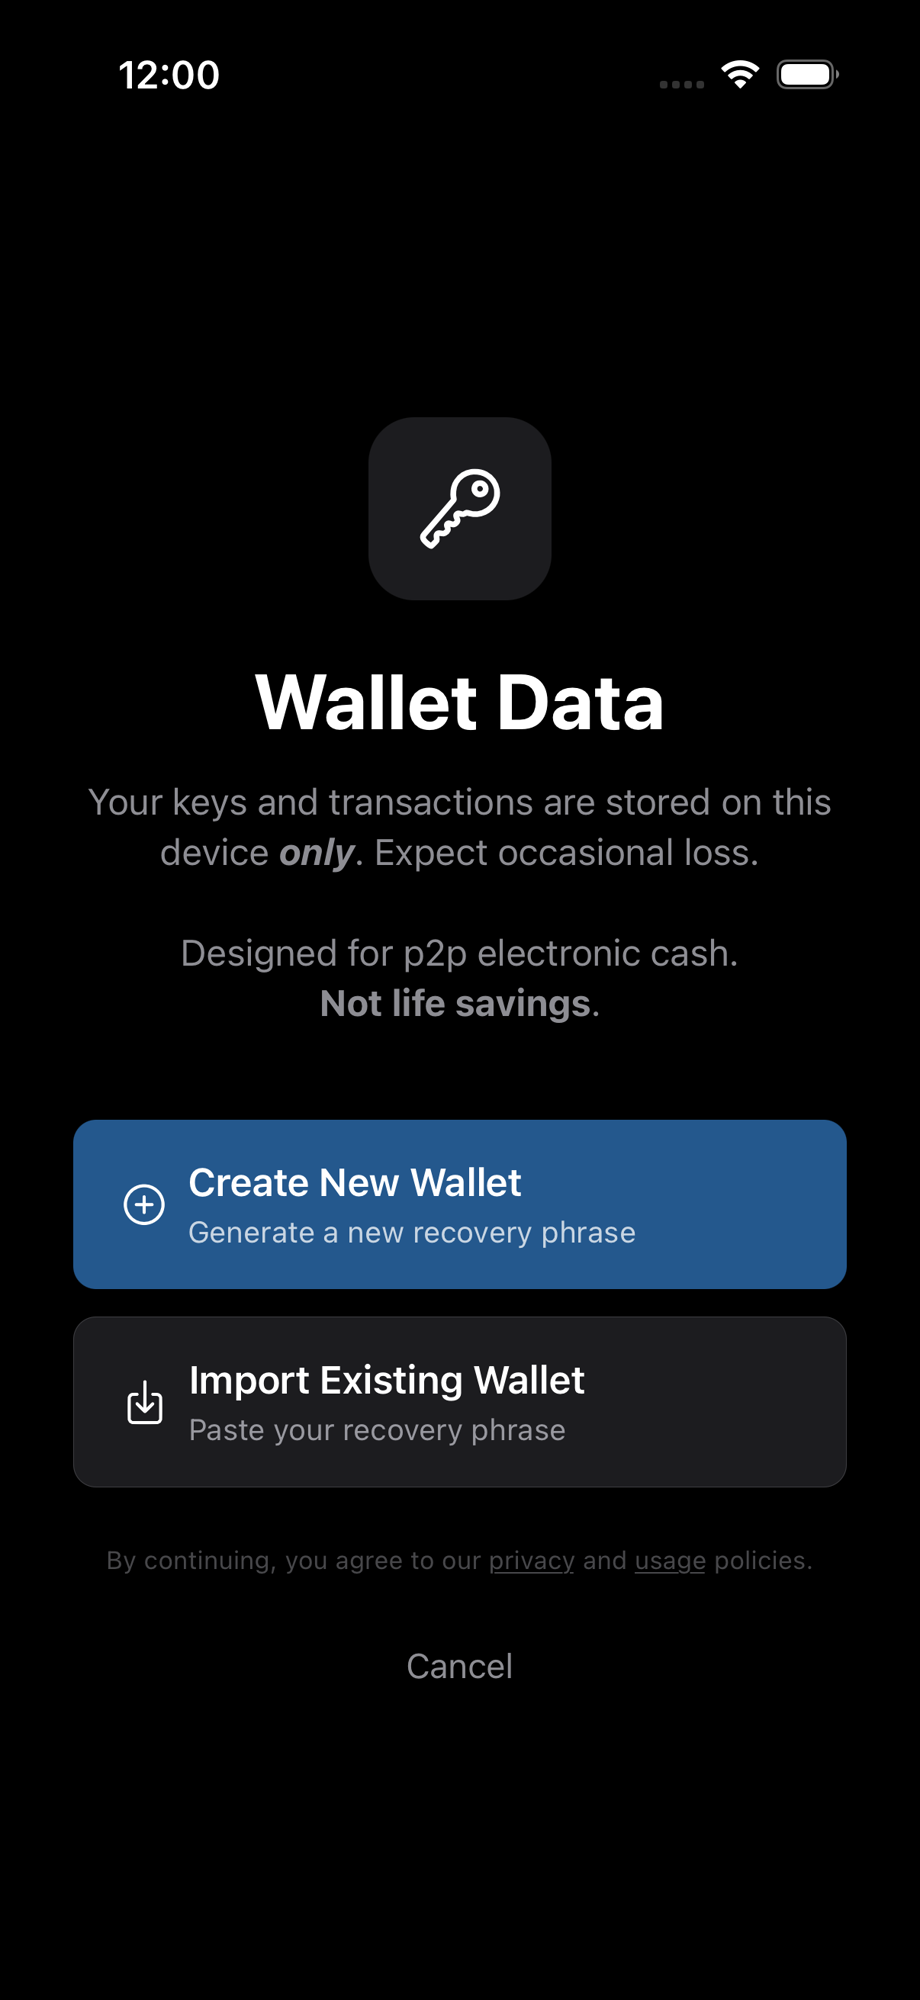
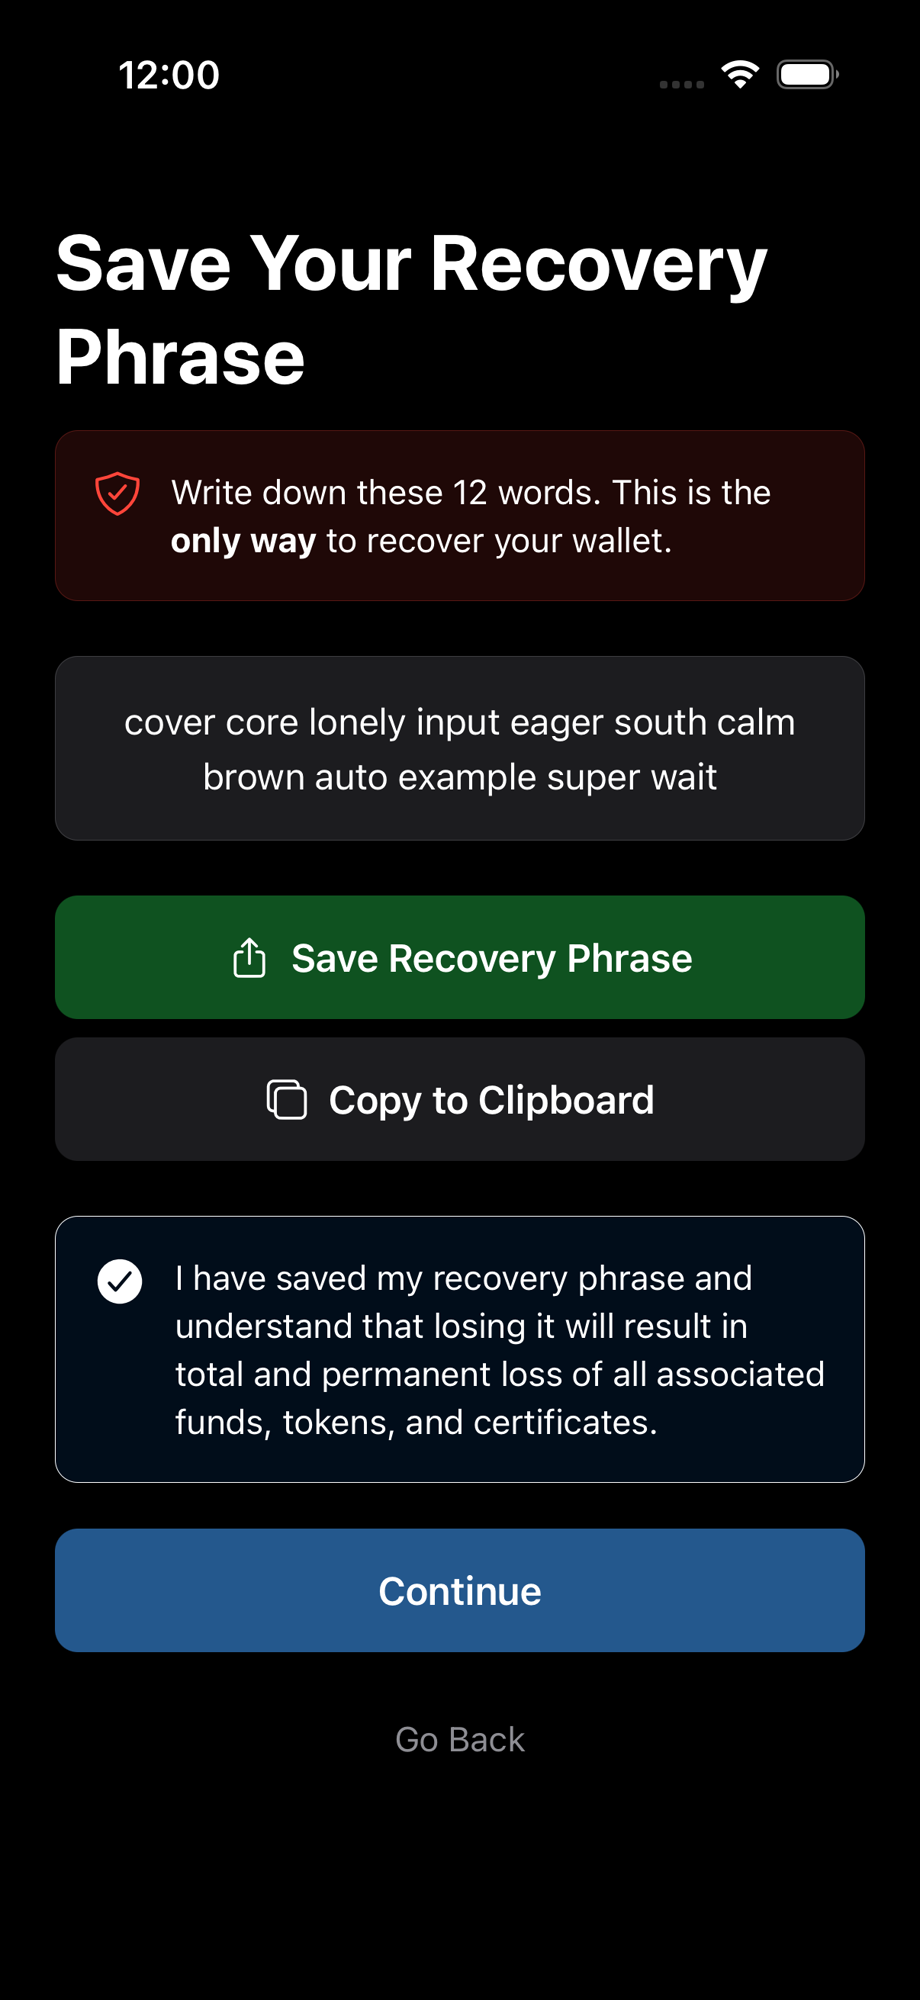
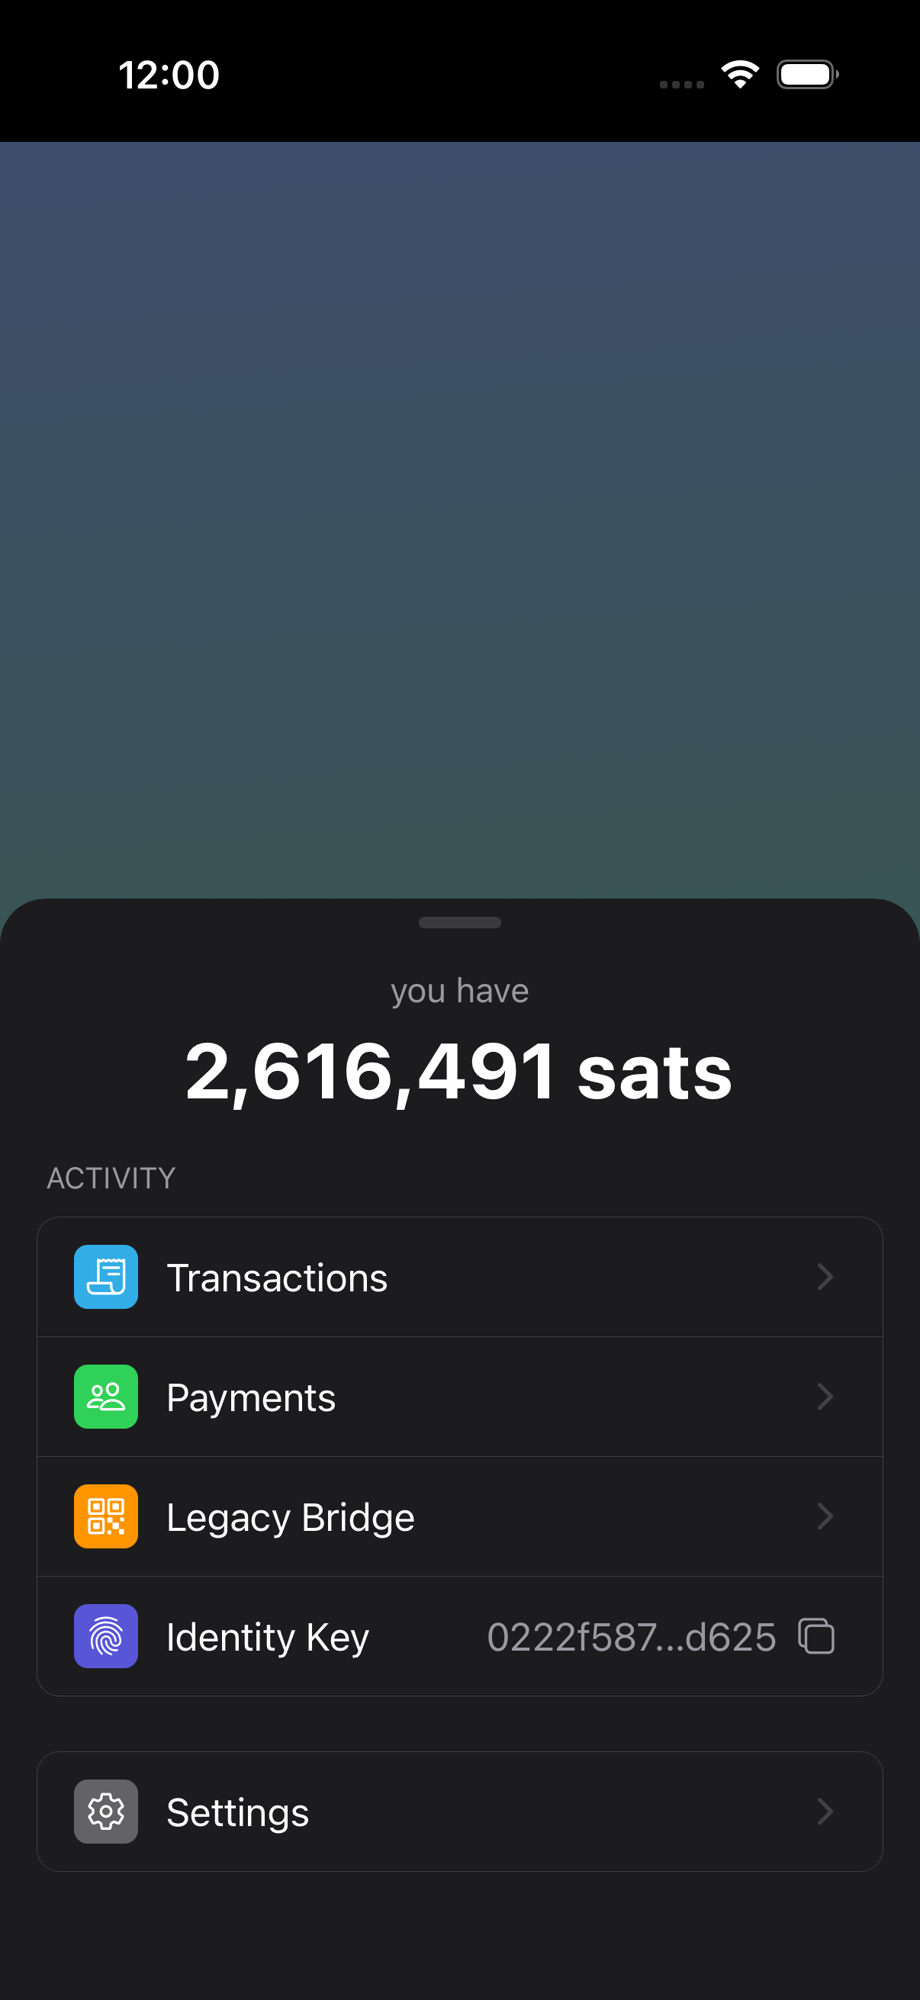
A free, open source web browser for iOS and Android that does everything your current browser does — plus three things it can't: hold a wallet, prove who you are, and pay fractions of a cent for anything.

A regular browser, with superpowers

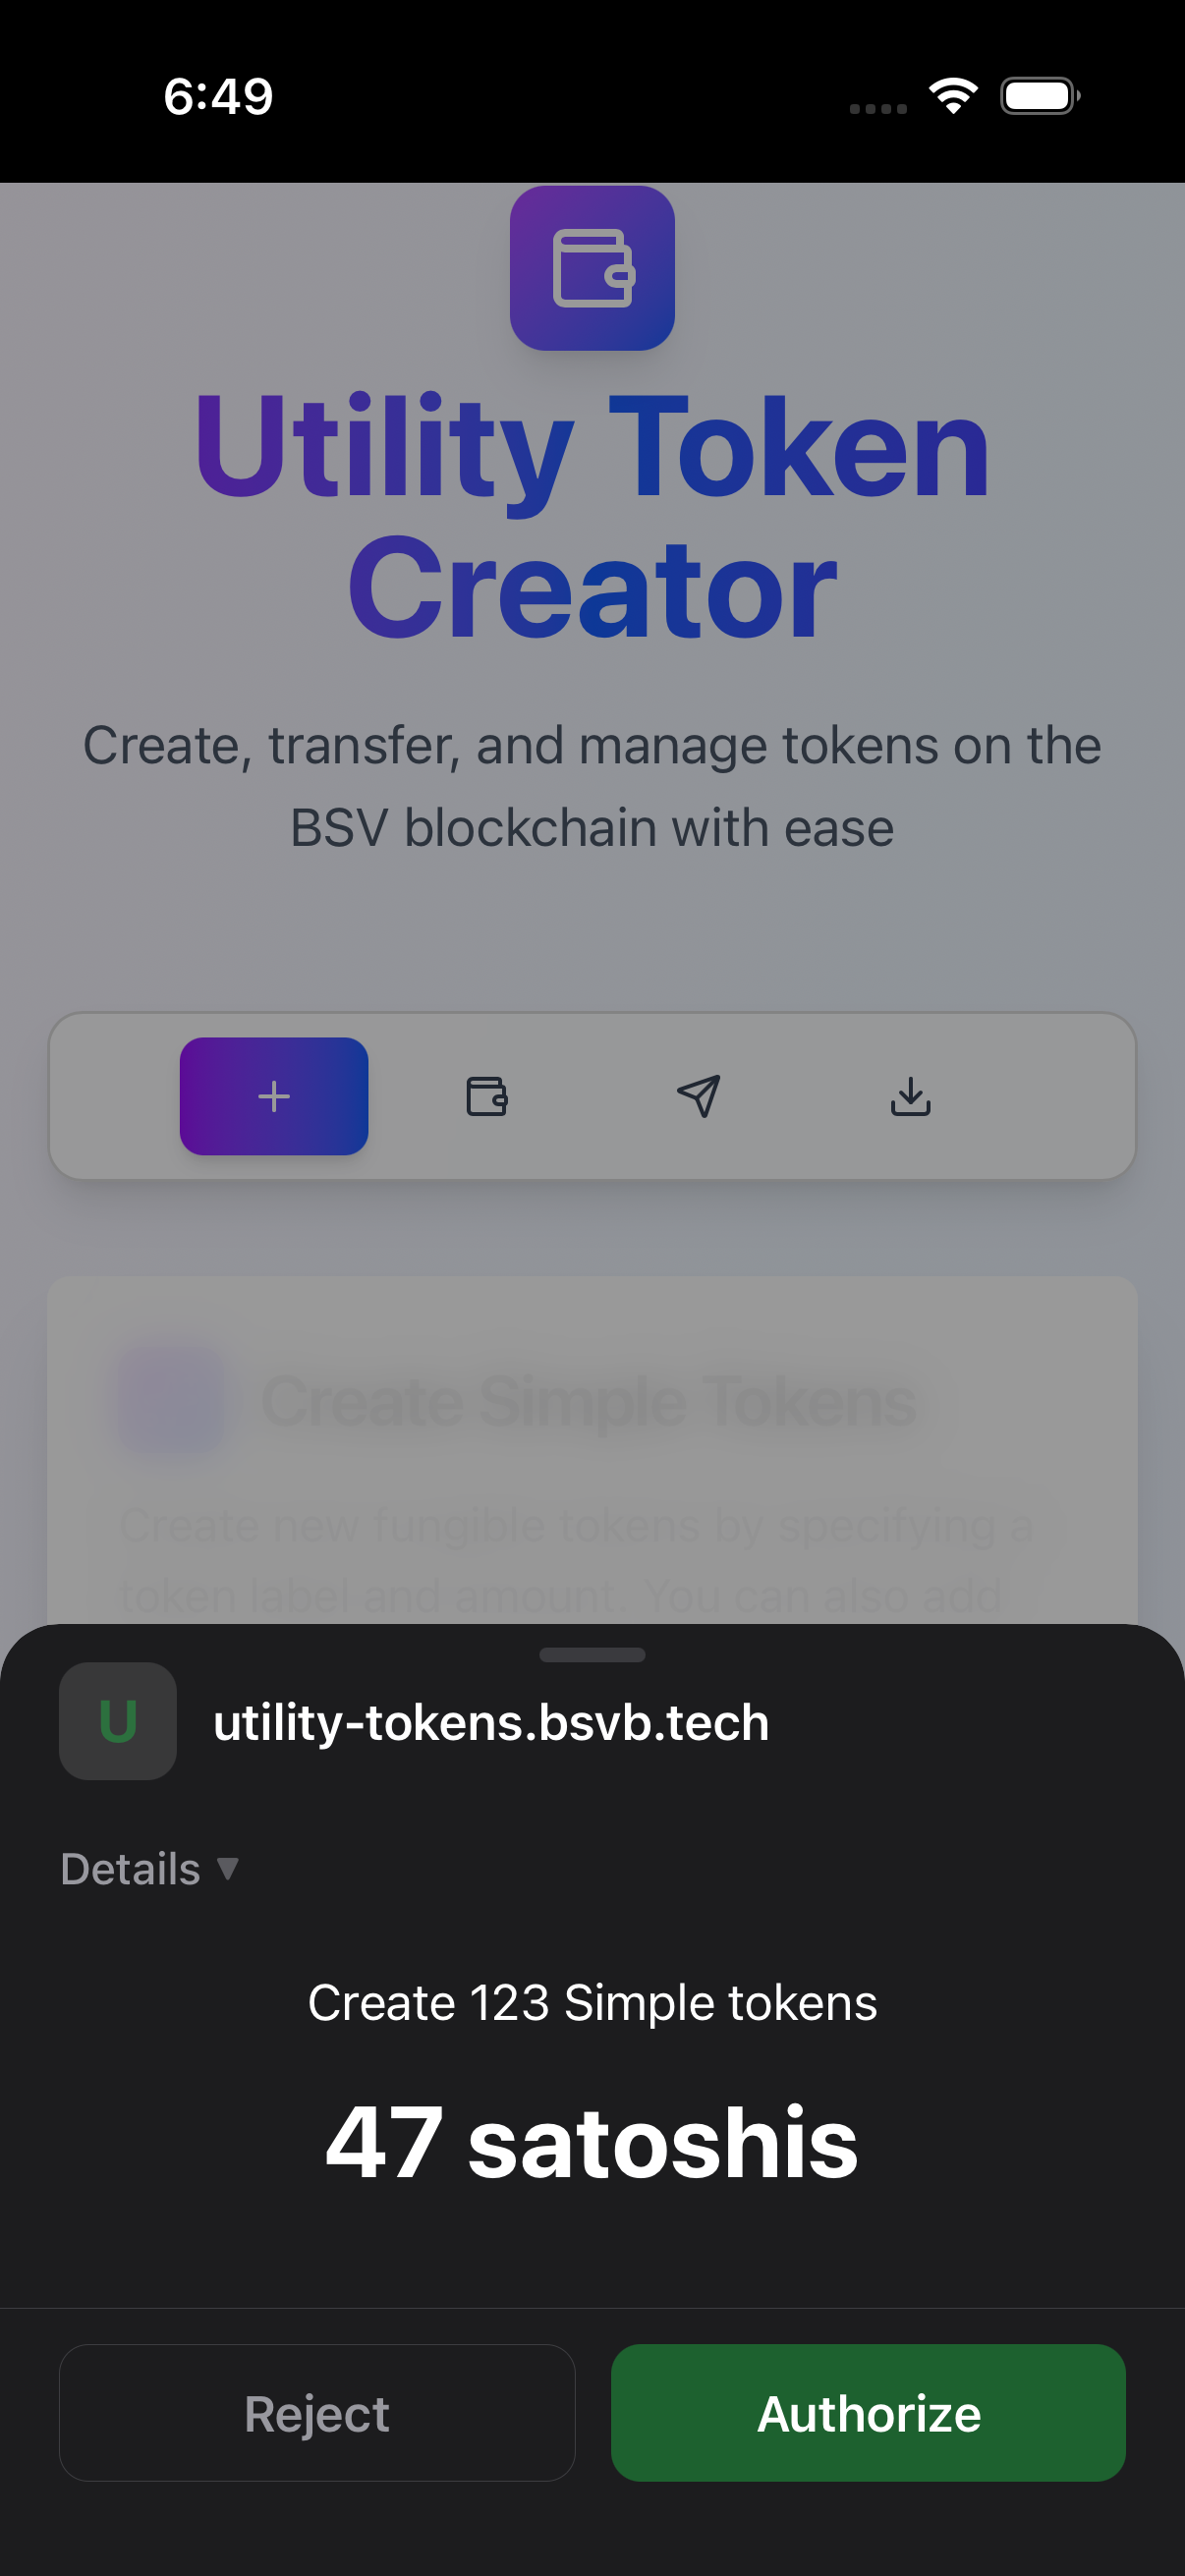
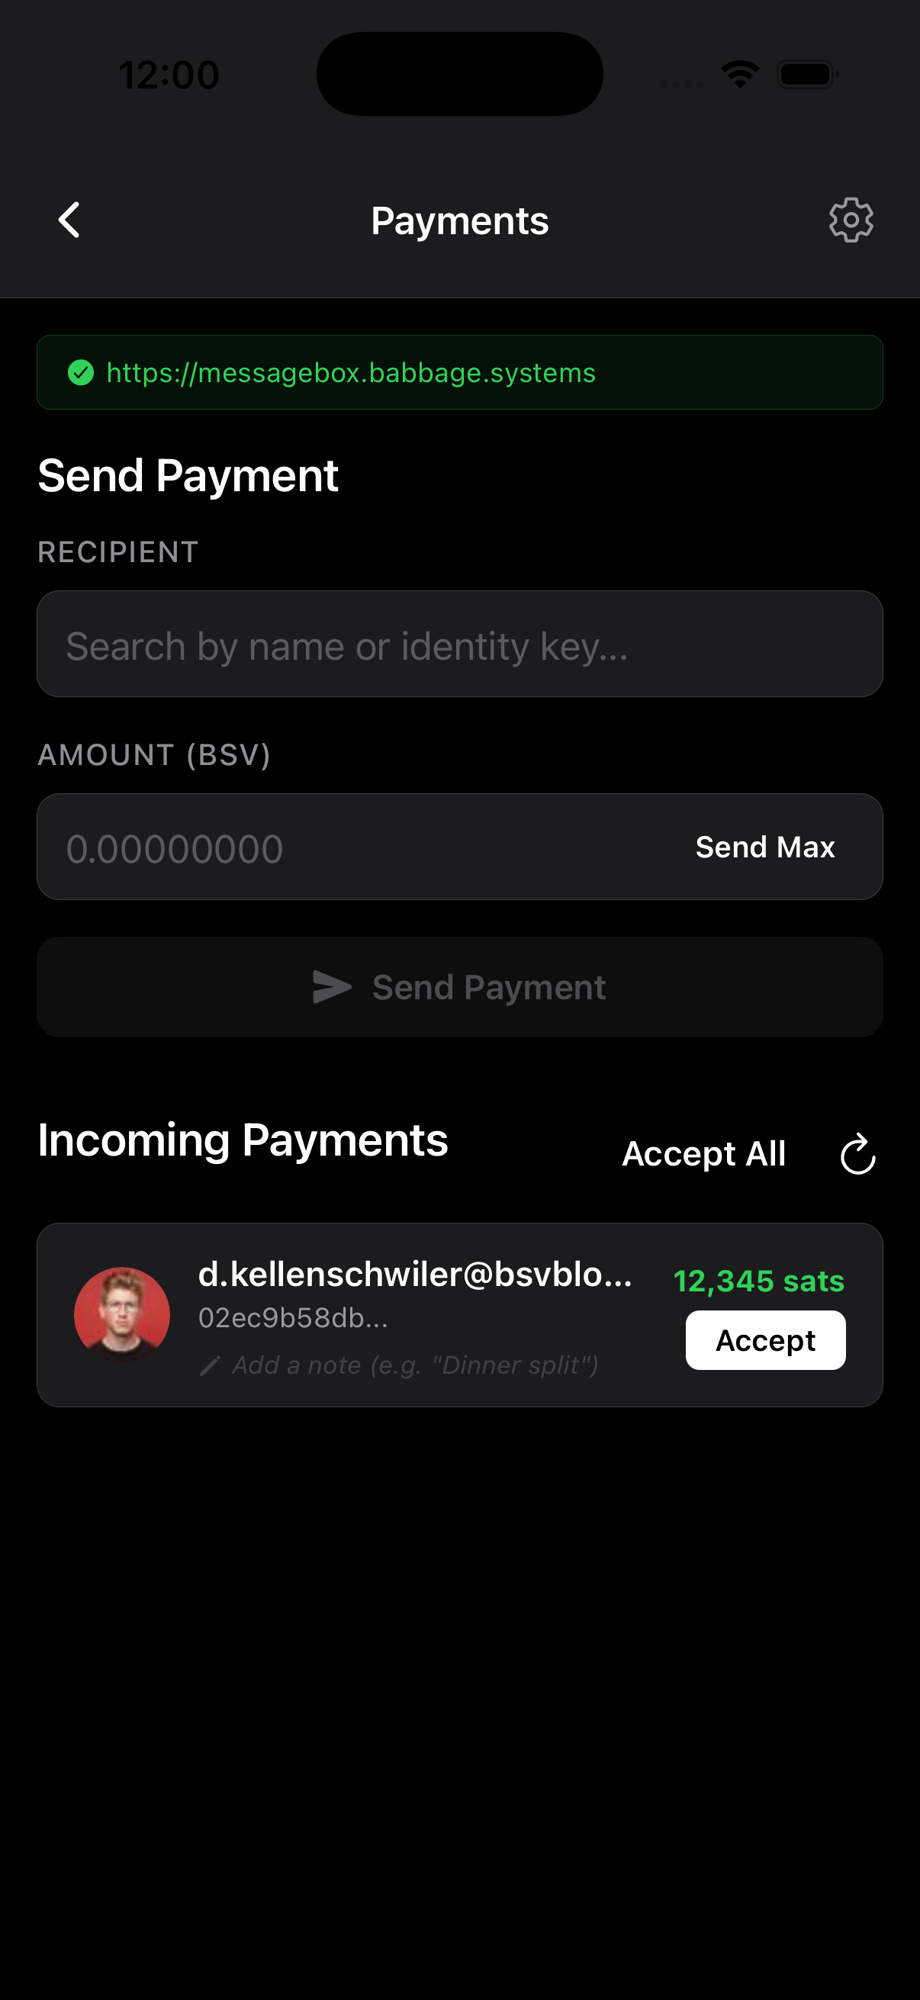
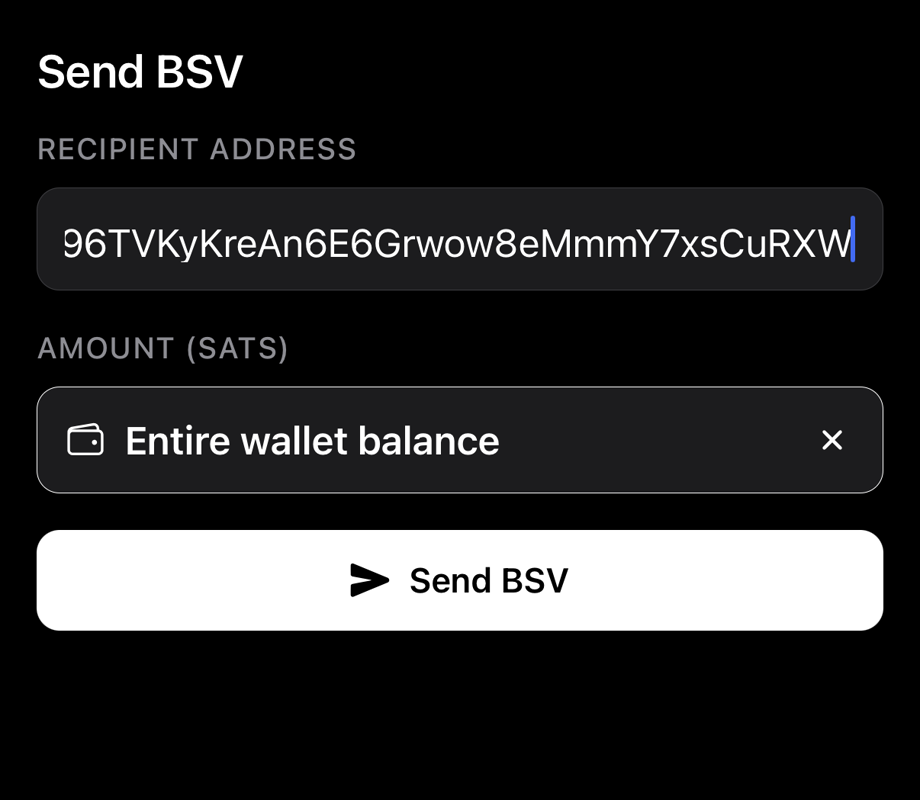
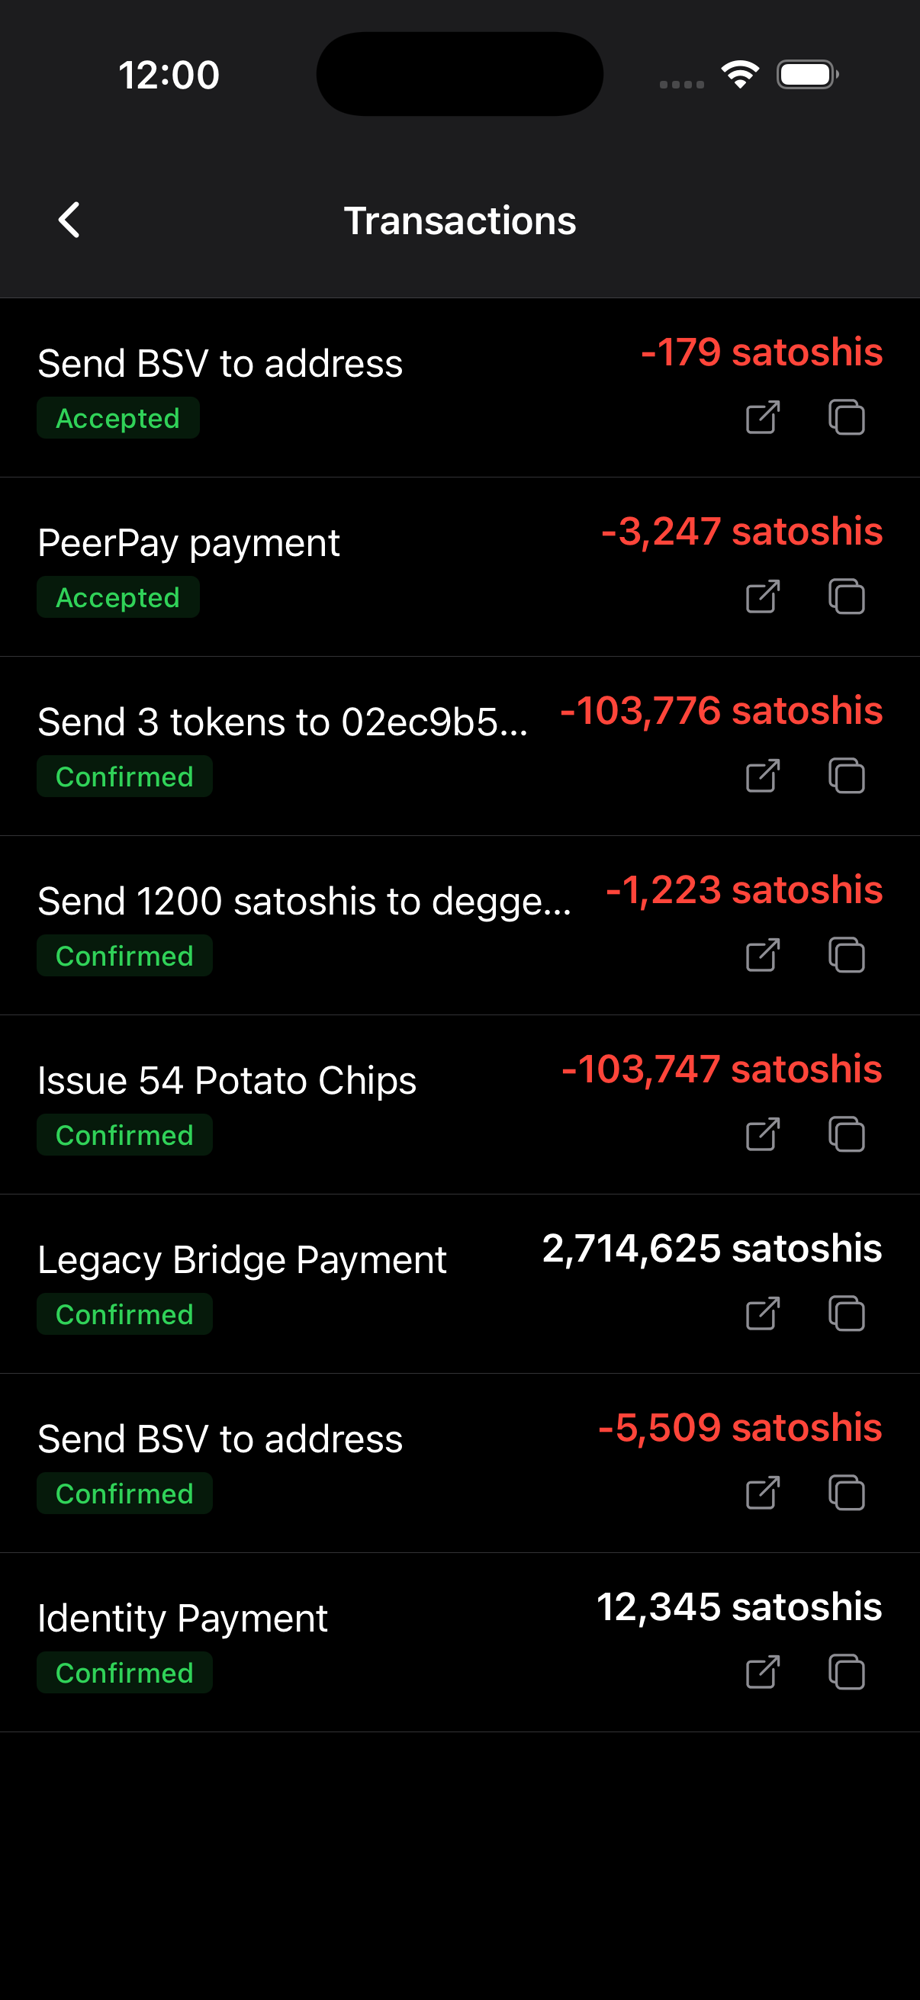
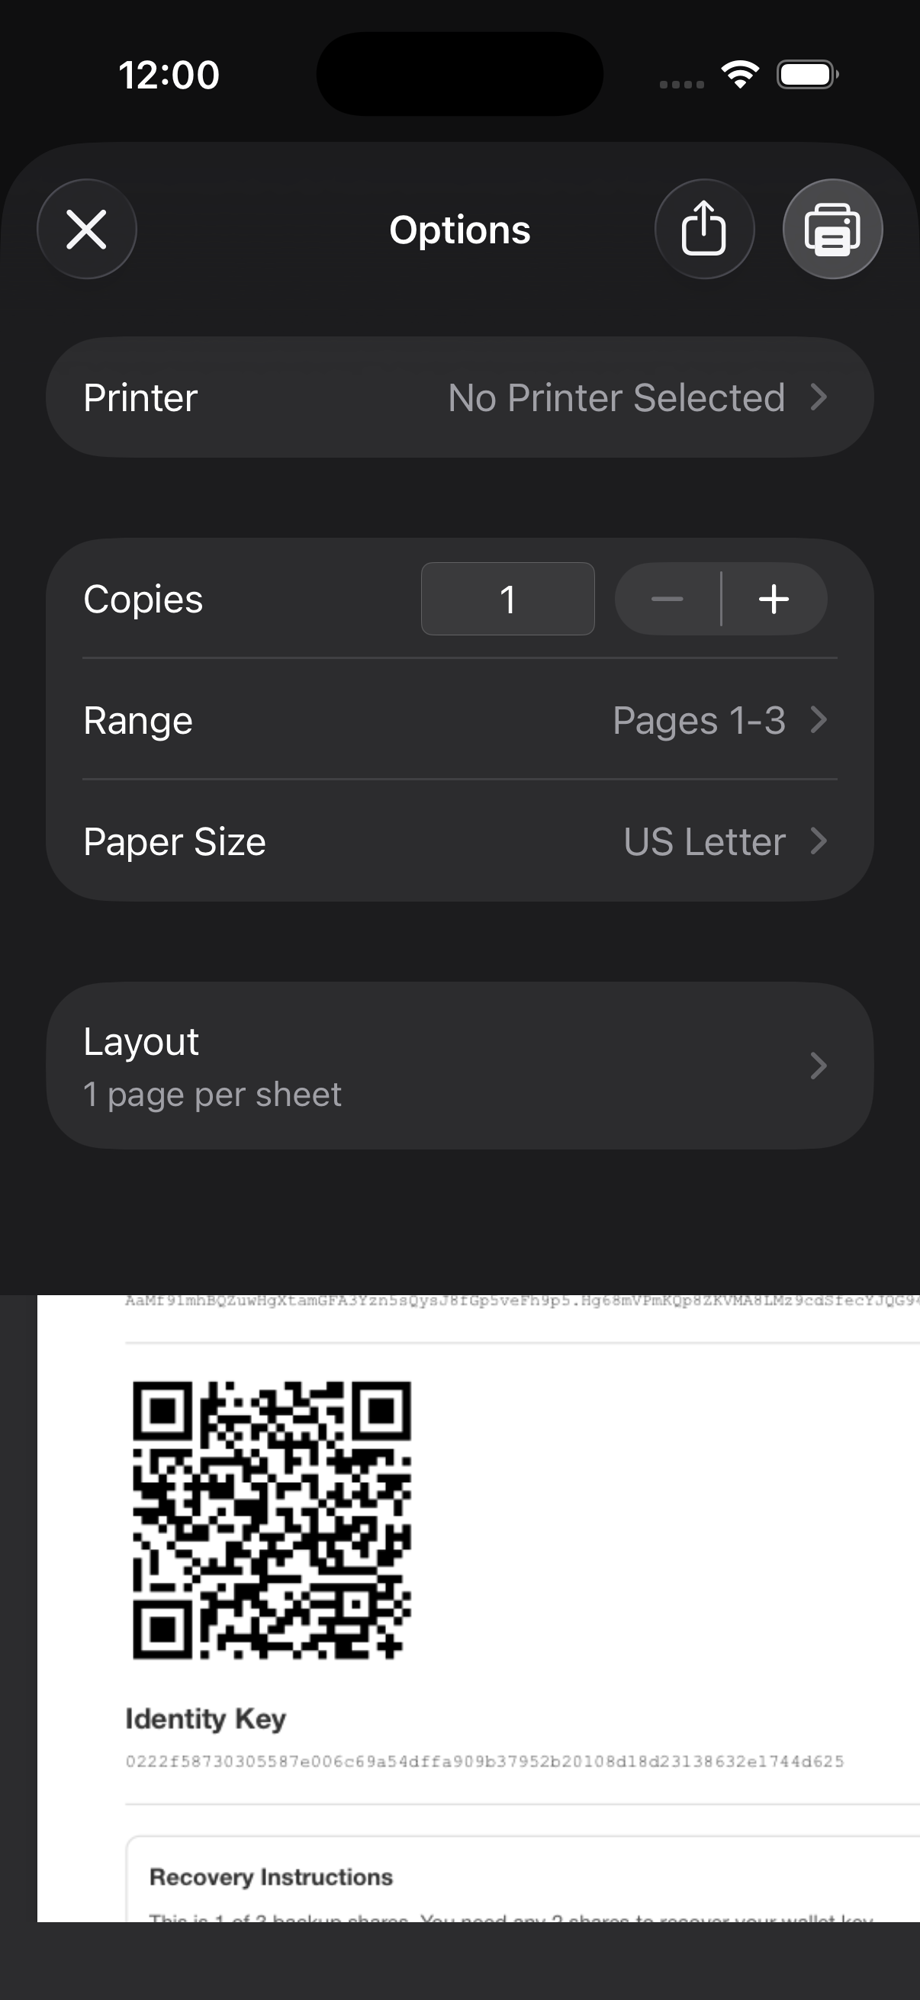
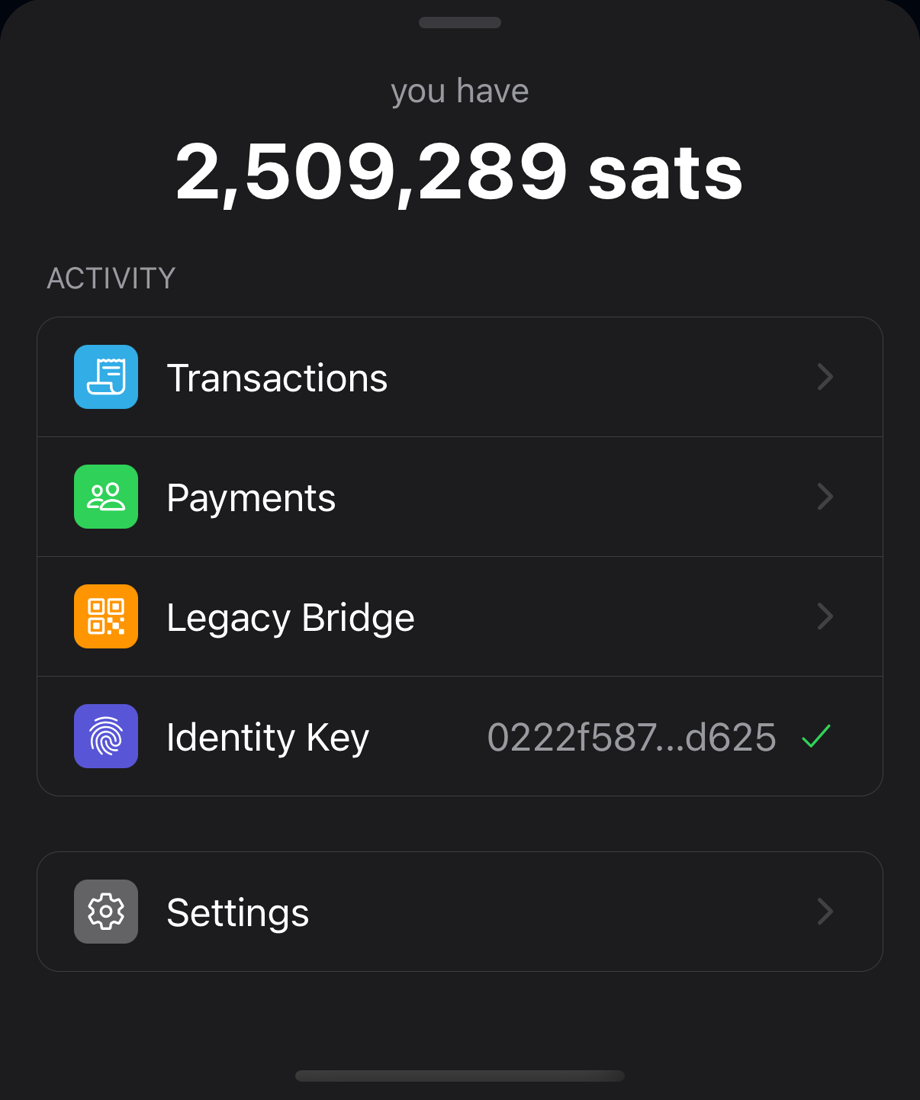
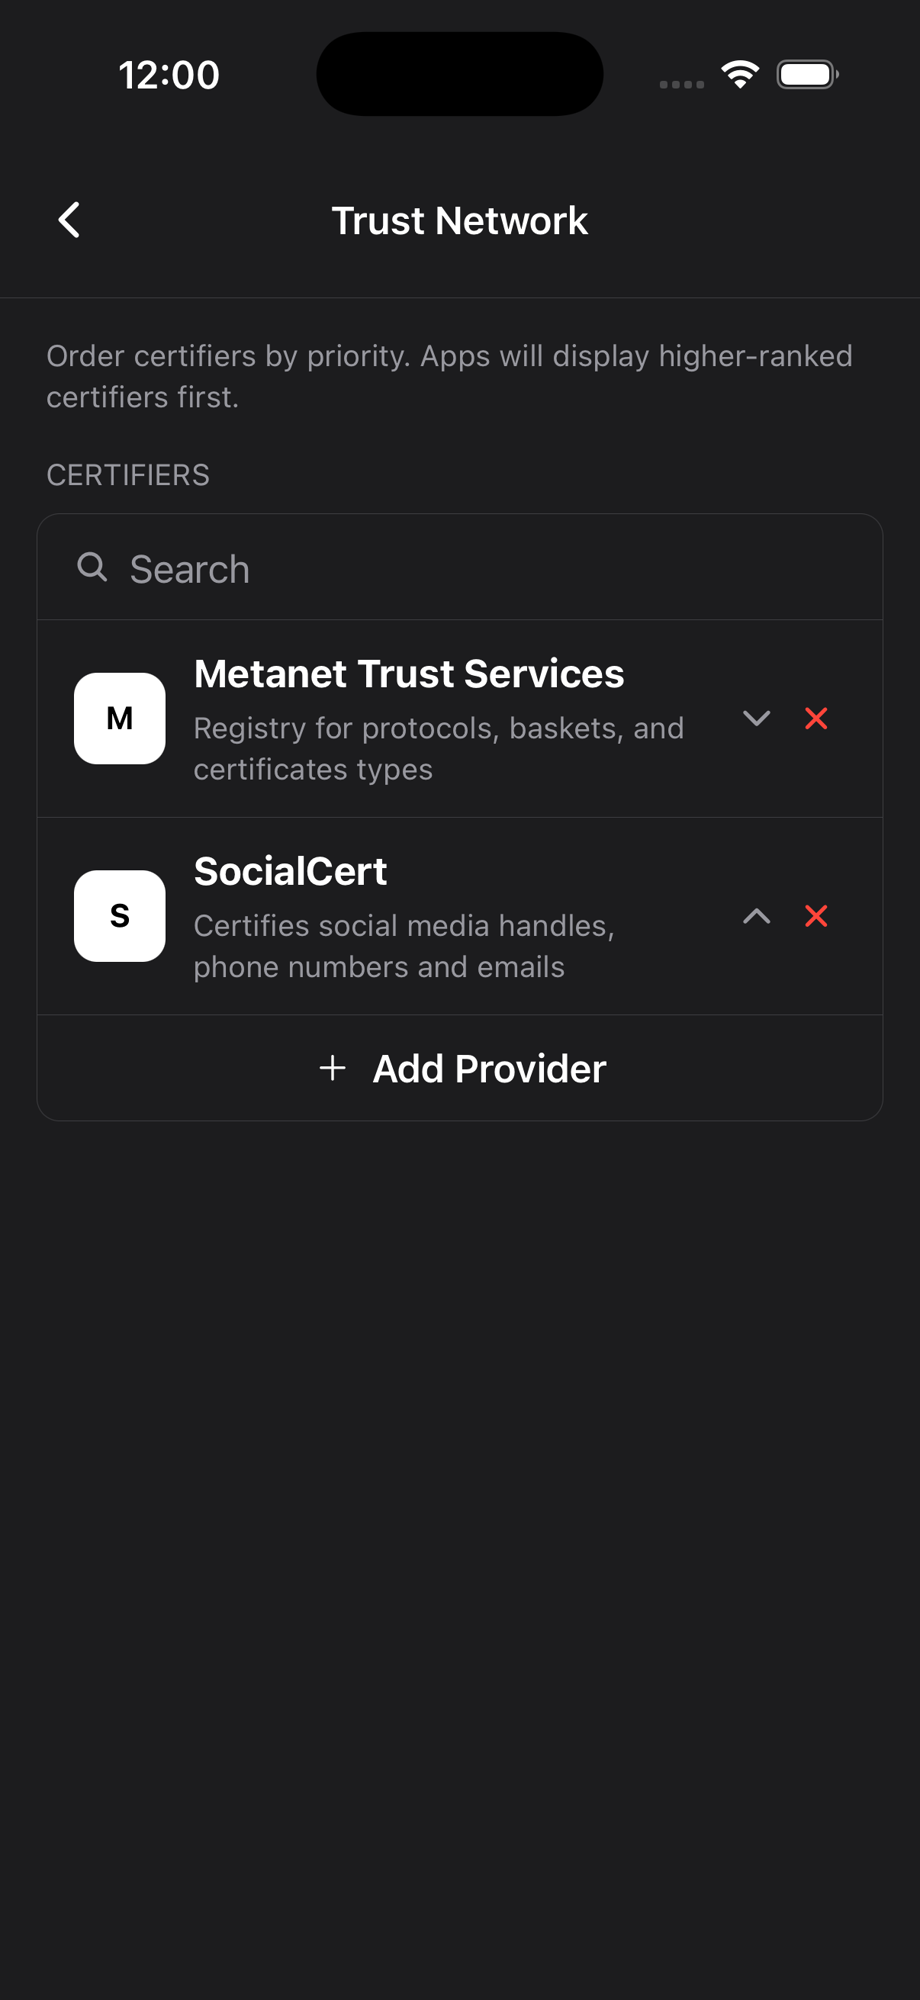
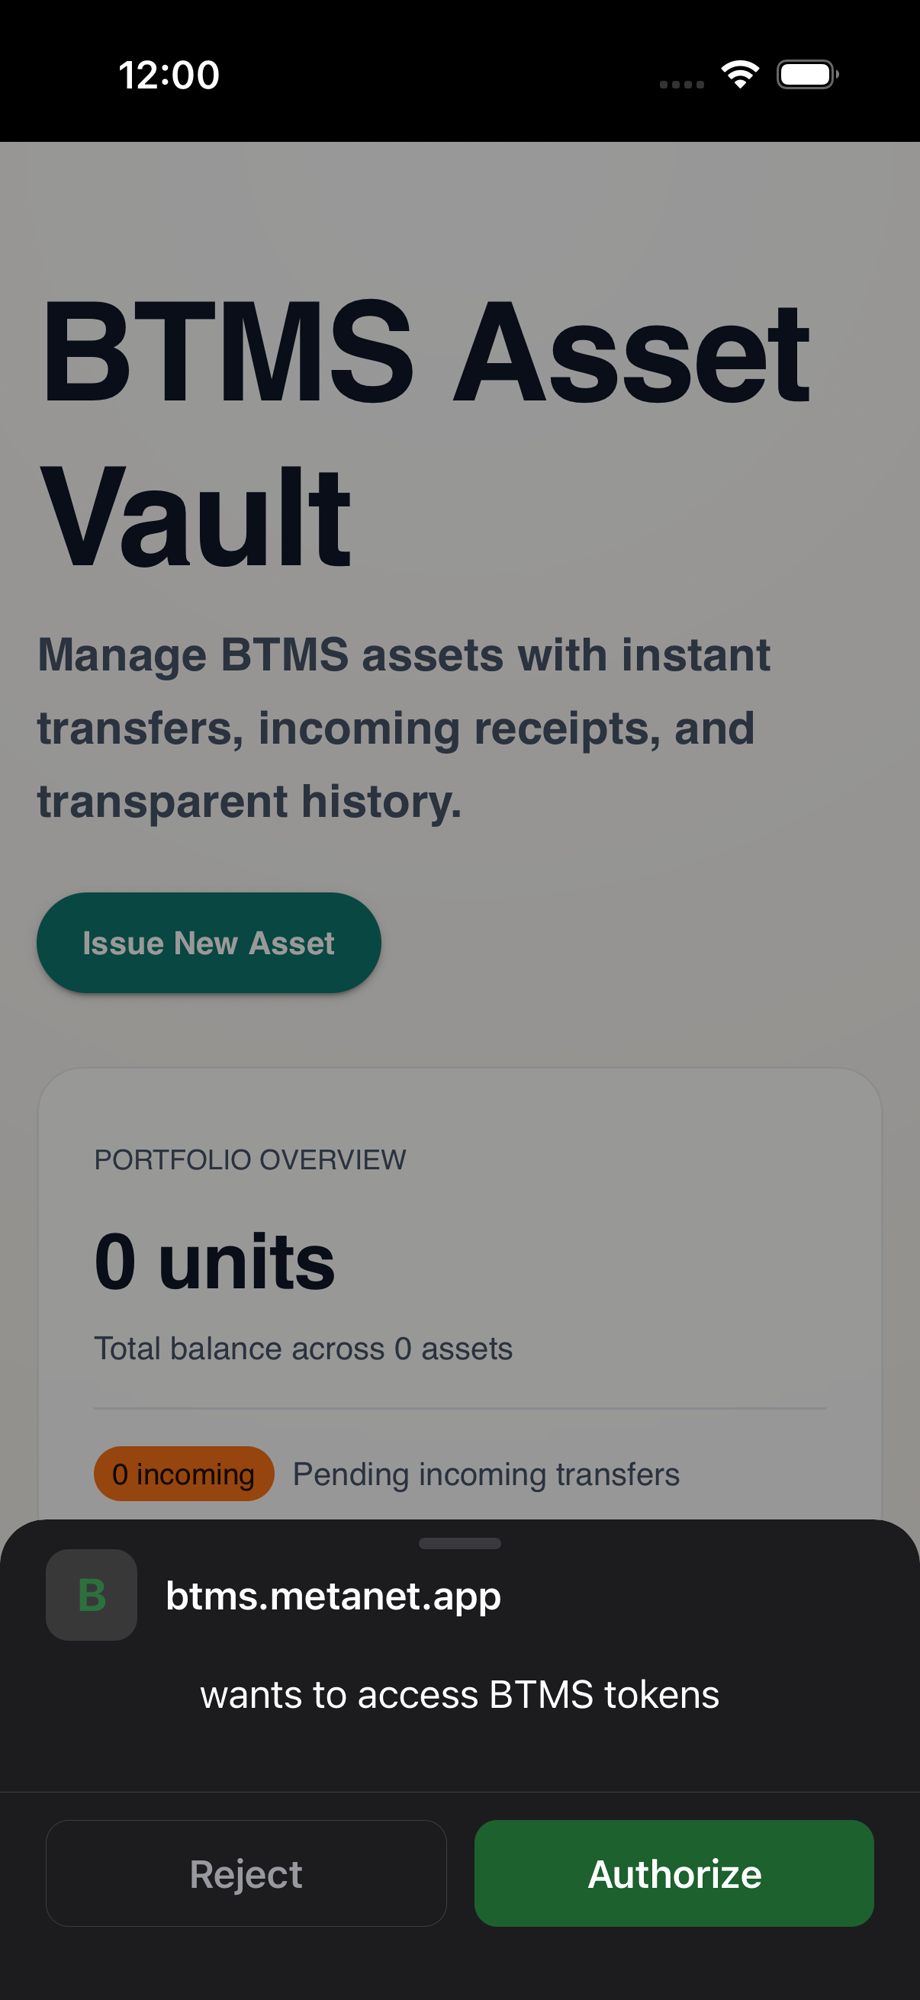
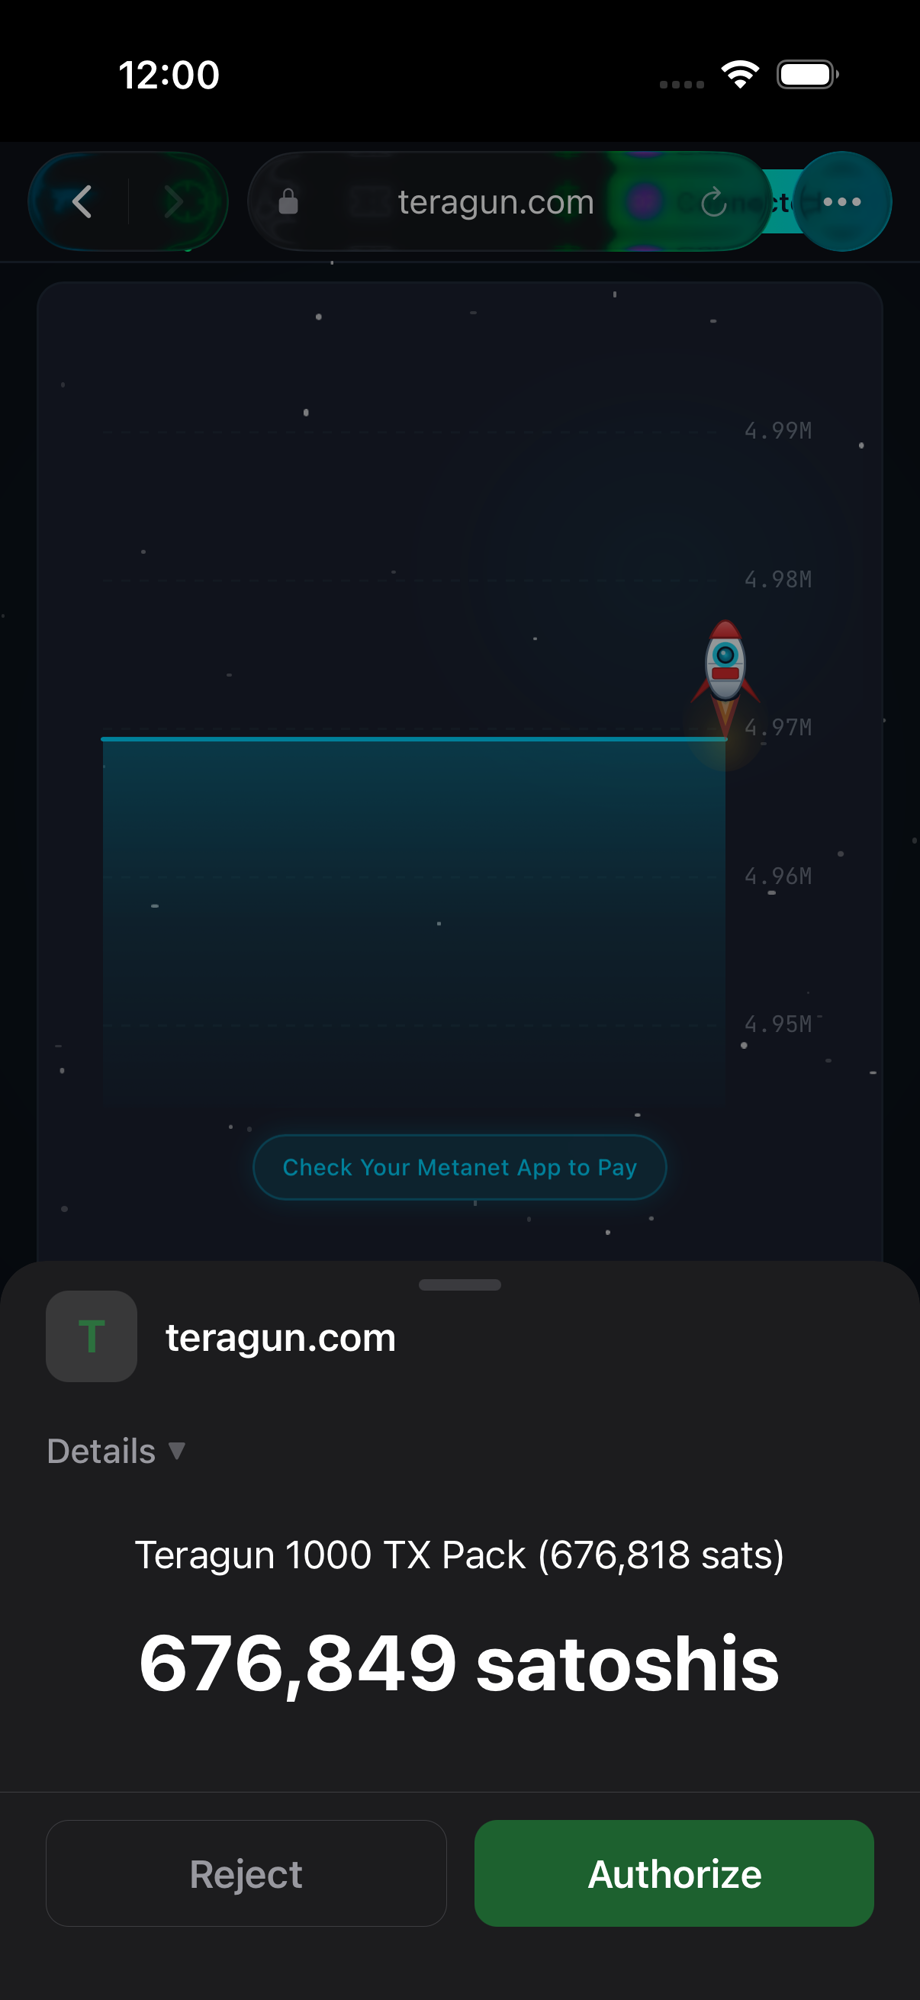
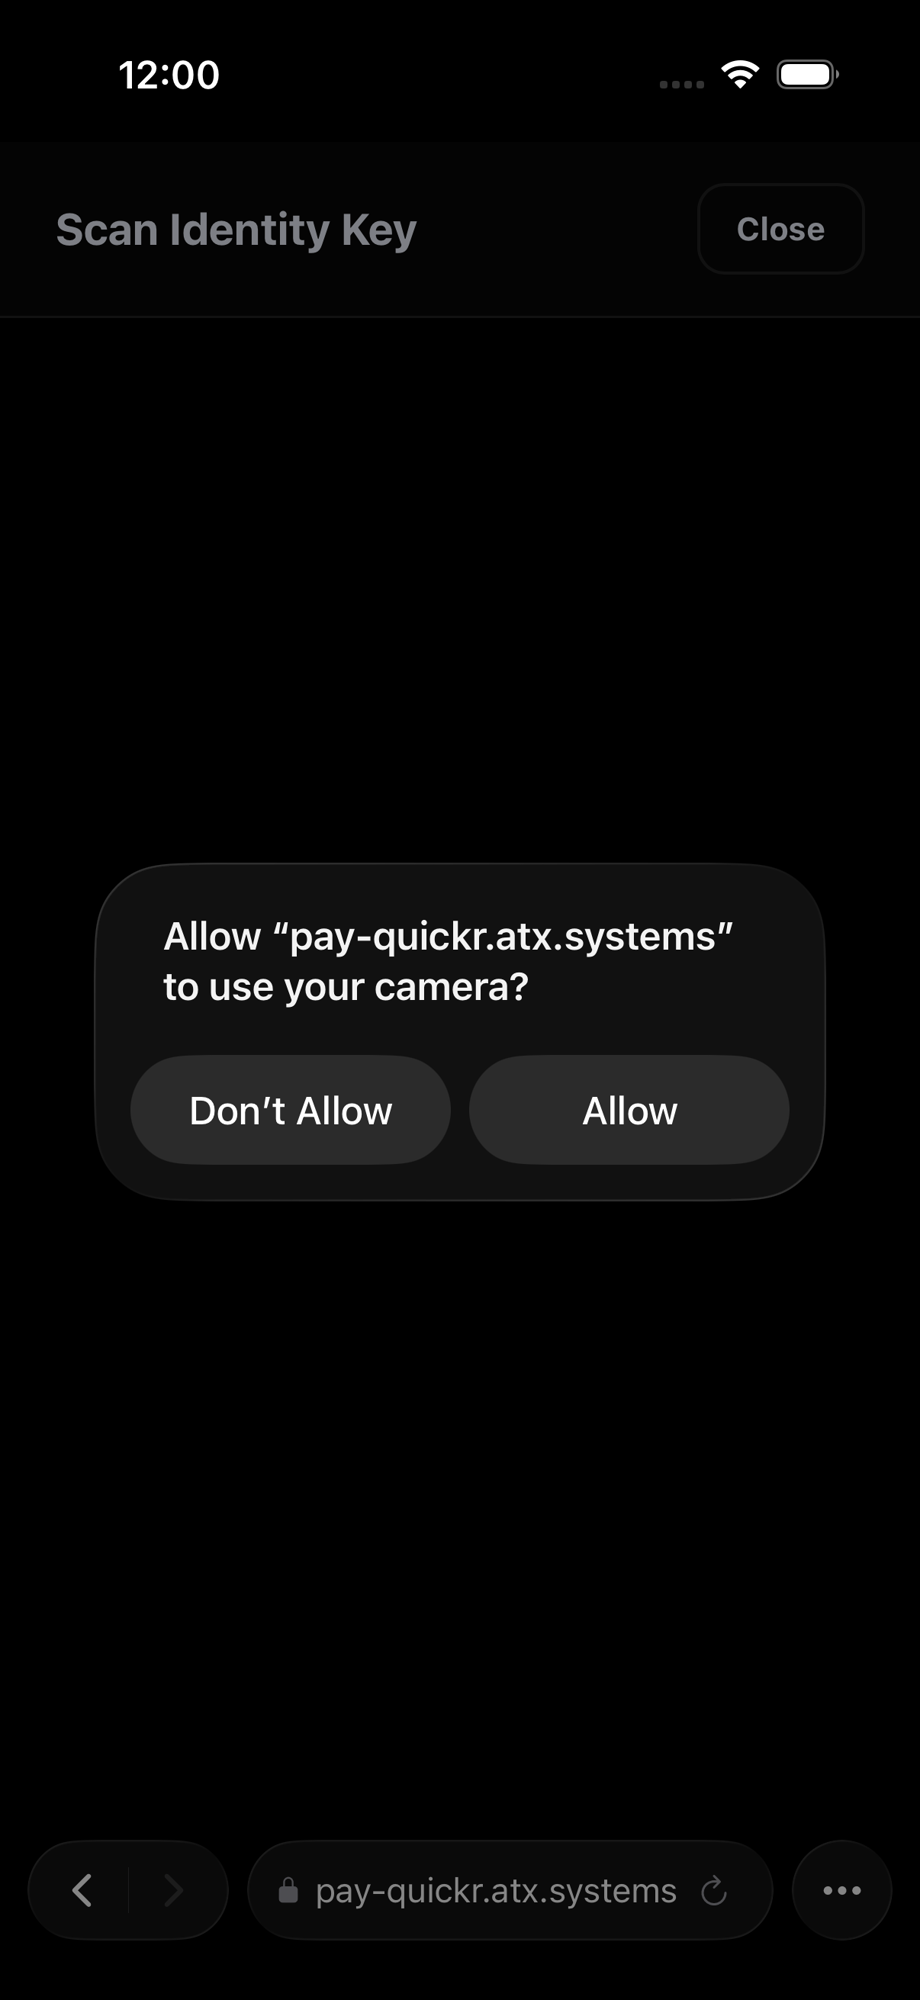
At its core, BSV Browser is a full-featured web browser. You can visit any website, manage bookmarks, keep browsing history, and open multiple tabs. What sets it apart is the optional Web3 layer: when you enable it, websites that support the BRC-100 standard can interact with your wallet for payments, identity verification, encryption, and more — all with your explicit permission.

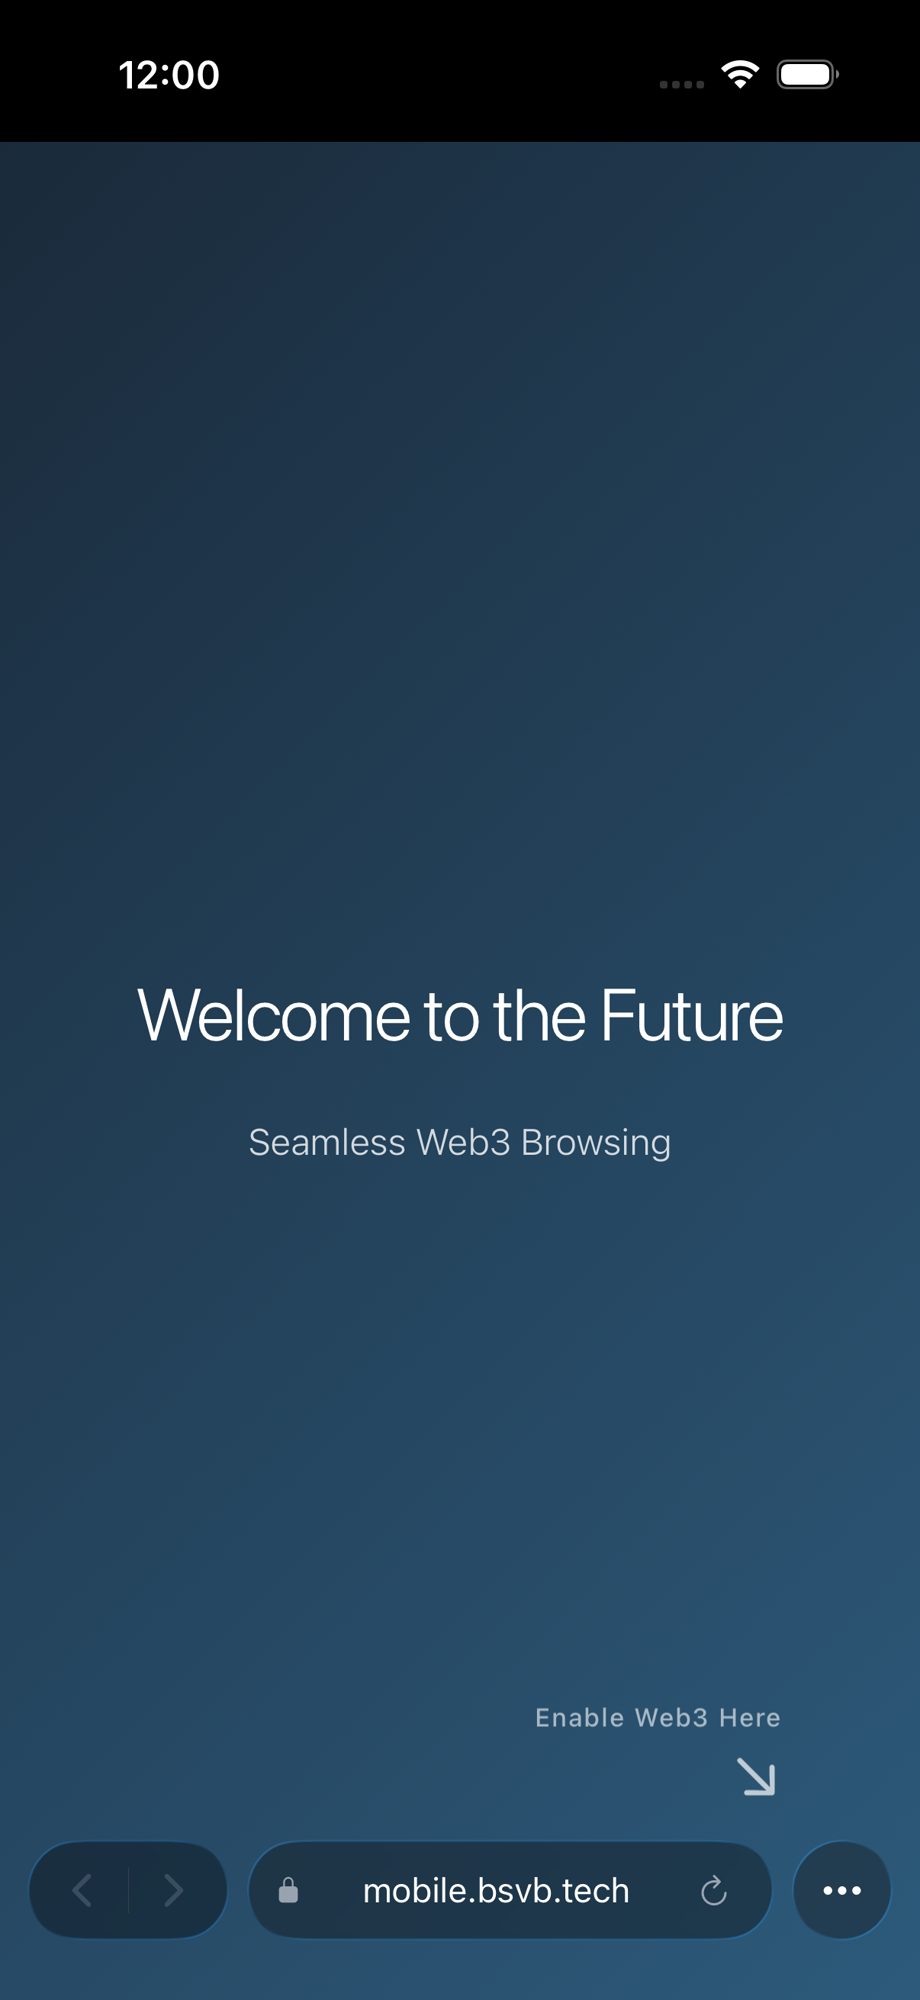
The browser ships with two modes:

  • Web2 Mode — a standard browser with no blockchain features active. This is the default until you choose to create or import a wallet.
  • Web3 Mode — enables the full suite of wallet, identity, and payment capabilities for compatible applications.
BSV Browser home page showing bookmarks, history, and search engine selector

Getting Started

Two steps: enable Web3 and save your recovery phrase. After that, you have a fully working wallet and identity on your phone.

Step 1: Enable Web3

When you first open the app, you are in Web2 mode. To unlock wallet and blockchain features, tap the menu button (the three dots at the bottom-right of the screen) and select Enable Web3. You will be presented with two options:

  • Create New Wallet — generates a fresh 12-word recovery phrase.
  • Import Existing Wallet — paste a BIP-39 recovery phrase you already have, or scan backup shares from a printed recovery sheet.

If you are not ready to create a wallet, tap Cancel and continue browsing in Web2 mode.

Wallet setup screen with Create and Import options

Step 2: Secure your recovery phrase

If you create a new wallet, you will see a 12-word recovery phrase. This is the only way to recover your wallet if you lose your device or reinstall the app.

  • Save Recovery Phrase — exports your phrase as a text file via the system share sheet, so you can save it to cloud storage, AirDrop it, or print it.
  • Copy to Clipboard — copies the phrase so you can paste it somewhere safe.
  • Confirm you have saved it by checking the acknowledgment box, then tap Continue.

Important: Your keys and transaction data are stored on your device only. BSV Browser is self-custodial — nobody else holds your keys. If you lose your recovery phrase, your wallet cannot be recovered.

Recovery phrase screen with Save and Copy options

Browsing the Web

Tabs, bookmarks, history, search — it works exactly like the browser you already use. Here's a quick tour of the interface.

Address bar and search

The address bar sits at the bottom of the screen. Tap it to enter a URL or search query. As you type, the browser shows autocomplete suggestions drawn from your bookmarks and browsing history.

If you type a term that does not look like a URL, the browser searches using your chosen search engine. You can pick from Startpage (the default), Brave, Google, Bing, or DuckDuckGo in the browser home page settings.

Tip: Look for the lock icon next to the URL — it indicates the site is served over HTTPS.

Address bar with autocomplete suggestions

Moving the address bar

By default the address bar sits at the bottom of the screen. If it ever covers a button or element at the bottom of a website, you can move it to the top. A swipe upward will move it to the top. A swipe downward will move it back again.

Tip: Some websites pin navigation or chat buttons to the bottom of the page. Moving the address bar to the top keeps those elements accessible.

Address bar moved to the top of the screen

Tabs

Open the menu and tap Tabs to see all your open tabs in a card-style overview. You can:

  • Swipe a tab card left or right to close it.
  • Tap + to open a new tab.
  • Tap Clear All Tabs to start fresh.

Your open tabs are automatically saved between sessions, so you pick up right where you left off.

Tab manager showing multiple open tabs

Bookmarks

Bookmarks appear as a scrollable row at the top of the browser home page. Tap any bookmark to open it. To manage all your bookmarks, tap See All > next to the Bookmarks heading to open a full-page list where you can:

  • Swipe left on any bookmark to delete it.
  • Tap Clear All to remove all bookmarks at once.
  • Tap any bookmark to navigate to it.

To add a bookmark, open the menu on any page and tap Add Bookmark.

Full bookmarks list with swipe to delete

History

The browser home page shows your recent browsing history. Tap See All > next to the History heading to open the full history list. From there you can:

  • Swipe left on any entry to delete it individually.
  • Tap Clear All to wipe your entire browsing history.
  • Tap any entry to revisit that page.
History list with swipe to delete

Search engine and homepage

On the browser home page you can customise two key settings:

  • Search Engine — tap the dropdown to switch between Startpage, Brave, Google, Bing, and DuckDuckGo. Your choice is remembered across sessions.
  • Homepage — tap the pencil icon next to the current homepage URL to change it. New tabs always open to your homepage.
Search engine dropdown and homepage editor on the browser home page

The menu

Tap the three-dot button at the bottom right to open the menu popover. From here you can:

  • Share the current page.
  • Add Bookmark for the page you are on.
  • Open the Browser page (bookmarks, history, homepage, search engine).
  • Submit a Bug Report (links directly to the GitHub issues page).
  • Open Wallet settings (or Enable Web3 if you have not set up yet).
  • View and manage Tabs.
Menu popover showing available options

Wallet & Payments

Your wallet lives on your device — only you hold the keys. Check your balance, send and receive BSV, and authorize micropayments to Web3 apps.

Wallet overview

Open the menu and tap Wallet to see your wallet. The main screen shows:

  • Your current balance in satoshis or fiat. Tap it to refresh.
  • Quick links to Transactions, Payments, and Legacy Bridge.
  • Your Identity Key with a copy button.
  • A Settings row that opens the full wallet configuration screen.
Wallet overview showing balance, activity links, and settings

Wallet configuration

Tap Settings from the wallet overview to access all wallet configuration options:

  • BSV Network — switch between Mainnet, Testnet, and Teratest. Changing the network rebuilds the wallet on the selected chain.
  • Trust Network — manage your trusted identity certifiers.
  • Recovery Phrase — tap to copy your mnemonic to the clipboard.
  • Print Recovery Shares — generate printable backup sheets (see Backup & Recovery below).
  • Export Wallet Data — export your wallet database files via the system share sheet.
  • Logout — clear all wallet data and return to Web2 mode.
Wallet configuration screen with network, recovery, and export options

Micropayments in Web3 apps

When you visit a Web3-enabled website, it can request a payment from your wallet. A permission sheet slides up from the bottom of the screen showing:

  • The requesting website's domain.
  • A description of what you are paying for.
  • The exact amount in satoshis (and fiat equivalent).

You can tap Authorize to approve or Reject to decline. No payment is ever made without your explicit approval.

Tip: Micropayments on BSV are typically fractions of a cent, making it practical to pay for individual actions like saving a note, posting a message, or accessing premium content.

Micropayment authorization prompt from a Web3 app

Peer-to-peer identity payments

The Payments screen lets you send BSV directly to another person using their identity rather than a raw blockchain address. Search for the recipient by name across the BSV identity network, enter an amount, and send.

Incoming payments appear in a list. You can accept them individually, or tap Accept All to batch-accept every pending payment at once. A result banner confirms how many were accepted.

Payments screen showing incoming payments with Accept All button

Legacy Bridge

For compatibility with traditional BSV wallets and services, BSV Browser supports standard address-based transactions via the Legacy Bridge screen.

  • Receive: A unique address and QR code are generated for each day. Share them with anyone who wants to send you BSV. Incoming funds are automatically detected and imported into your wallet — no manual action needed.
  • Send: Enter a BSV address and amount, then confirm. You can also tap Send Max to send your entire balance.
  • Use the arrow buttons to navigate between daily addresses if you need to check a previous day's receive address.
Legacy Bridge screen receiving funds with auto-import

Sending from Legacy Bridge

Below the receive section, the Legacy Bridge includes a full send form. Enter the recipient's BSV address and the amount you want to send.

  • Tap Send BSV to broadcast the transaction.
  • Tap Send Max to send your full available balance.

A success or error banner appears after the transaction is submitted.

Legacy Bridge send form with address and amount fields

Transaction history

The Transactions screen lists all your transactions with colour-coded status badges:

  • Green — Confirmed, accepted, or broadcasting.
  • Yellow — Pending states (unsigned, non-final, not yet sent).
  • Red — Failed transactions.

For each transaction, you can view it on the block explorer, copy the raw transaction data, or abort transactions that are still pending.

Transaction history with colour-coded status badges

Backup & Recovery

You hold the keys, so you control the backups. BSV Browser gives you two methods — a 12-word phrase and printable recovery shares — so you can pick the approach that fits your life.

Recovery phrase

When you create a wallet, a 12-word recovery phrase is generated. This phrase can restore your wallet on any compatible device. You can access it at any time from Wallet > Settings > Recovery Phrase.

During wallet creation, you can save it two ways:

  • Save Recovery Phrase — exports a .txt file via the system share sheet (AirDrop, Files, email, etc.).
  • Copy to Clipboard — copies the words so you can paste them into a secure note or password manager.

Important: Anyone with your recovery phrase can access your wallet. Store it somewhere safe and never share it.

Recovery phrase screen with Save as file and Copy to clipboard options

Print recovery shares

For extra security, BSV Browser can split your wallet key into three printed shares using Shamir's Secret Sharing. Any two of the three shares are enough to recover your wallet, but a single share alone reveals nothing.

To generate shares:

  • Go to Wallet > Settings > Print Recovery Shares.
  • The app generates three pages, each containing a QR code and the share text.
  • The system print dialog opens so you can print them to paper or save as PDF.

Store each share in a separate, secure location. For example: one at home, one at work, one with a trusted family member.

Printed recovery share page with QR code and share text

Recover from backup shares

If you have printed recovery shares, you can restore your wallet by scanning any two of the three sheets:

  • On the wallet setup screen, tap Import Existing Wallet, then tap Scan Backup Shares.
  • The camera opens with a QR scanner. Point it at your first share.
  • Progress dots at the bottom show how many shares you have scanned and how many are still needed.
  • After scanning the second share, the wallet is automatically recovered and you are taken to the browser.

The scanner validates each share as you scan it. Duplicate or incompatible shares are rejected with an error message so you always know what is happening.

Camera QR scanner with progress dots showing one of two shares scanned

Identity & Trust

No usernames. No passwords. No sign-up forms. Your identity is a cryptographic key derived from your wallet, and you decide exactly what to share with each app.

Your identity key

When you create or import a wallet, a unique identity key is generated. This key represents you across all Web3 applications. It is shown on the wallet overview screen — tap the copy button next to it.

Web3 applications use this key to identify you without needing email addresses, phone numbers, or any other personal information. Mutual authentication means both you and the app prove who you are.

Wallet overview with identity key and copy button

Trust network

The Trust Network screen lets you manage which identity certifiers you trust. Certifiers are entities that vouch for identity attributes (like a real name or organisation membership).

  • View your list of trusted certifiers, ordered by priority.
  • Reorder certifiers to set preference priority.
  • Add new providers by entering their domain (the app fetches their trust manifest) or manually by entering their details.
  • Remove certifiers you no longer trust.

When a Web3 app asks to verify an identity certificate, it checks against your trusted certifiers.

Trust network screen showing list of trusted certifiers

Certificates and selective revelation

BSV Browser supports identity certificates that allow you to prove specific attributes about yourself without revealing everything. For example, you could prove you are over 18 without revealing your exact date of birth, or prove your organisation membership without revealing your name.

When a Web3 application requests certificate information, a permission sheet appears showing exactly which fields are being requested. You always have the choice to approve or reject.

Permission sheet showing certificate field request from a Web3 app

Permissions & Privacy

Nothing happens without your say-so. Every wallet action requires explicit approval, and BSV Browser never collects or transmits your browsing data.

Wallet permissions

When a Web3 application requests an action from your wallet, a detailed permission sheet appears. Depending on the request type, you may see:

  • Spending requests — the domain, amount, and description of the payment.
  • Protocol access — requests to use cryptographic operations (signing, encryption).
  • Certificate access — requests to read specific identity certificate fields.
  • Basket access — requests to manage transaction output groups.

Every request shows the originating domain. Tap Authorize to approve or Reject to decline.

Permission sheet for a spending request

Device permissions

Websites may also request standard device permissions such as camera, microphone, or location access. These are handled per-domain:

  • A clear modal explains what permission is being requested and by which website.
  • You can choose to Allow or Deny.
  • Your decision is remembered for that domain.
Device permission modal for camera access

Your privacy

BSV Browser does not collect your browsing history, cookies, or tracking data. Browsing history and bookmarks are stored only on your device and are never transmitted to BSV Association or any third party.

For full details, read the Privacy Policy and Usage Policy.

Settings page highlighting the Logout button

Tips & Settings

Get the most out of BSV Browser with these tips.

Set BSV Browser as your default browser

On first launch, BSV Browser will offer to become your default browser. On iOS, go to Settings > Apps > Default Apps. On Android, go to Settings > Apps > Default apps > Browser app. This way, all links you tap in other apps open in BSV Browser.

Choose your search engine

Open the browser home page (tap the menu, then Browser) and use the Search Engine dropdown to pick your preferred engine. Startpage is selected by default for its privacy focus, but you can switch to Brave, Google, Bing, or DuckDuckGo at any time.

Switch between networks

In Wallet > Settings, tap BSV Network to switch between Mainnet (real BSV), Testnet (test coins for development), and Teratest. Switching networks rebuilds the wallet on the selected chain. Use Testnet to experiment without risking real funds.

Print backup shares for peace of mind

Go to Wallet > Settings > Print Recovery Shares to generate three printed pages containing your wallet key split into shares. Store each page in a different location. Any two of the three are enough to recover your wallet, but one alone is useless to an attacker. This is the most resilient backup option the app offers.

Export your wallet data

In Wallet > Settings, tap Export Wallet Data to save a backup of your wallet database files. This uses the system share dialog so you can send the files to cloud storage, email, or any other location.

View amounts in your local currency

BSV Browser supports displaying amounts in satoshis or fiat currencies (USD, EUR, GBP). Tap the balance display to cycle through formats. Exchange rates are updated automatically every five minutes.

Supported languages

The app automatically detects your device language. It is localised into English, Chinese (Simplified), Hindi, Spanish, French, Arabic, Portuguese, Bengali, Russian, and Indonesian.

Downloads

BSV Browser handles file downloads natively. When a website offers a file (PDF, ZIP, images, etc.), the browser intercepts the download and saves it using your device's native download mechanism.

Frequently Asked Questions

Do I need a wallet to use BSV Browser?

No. BSV Browser works as a fully functional web browser in Web2 mode without any wallet setup. You can enable Web3 features at any time by creating or importing a wallet.

Can I lose my funds?

BSV Browser is self-custodial. Your keys are stored only on your device. If you lose your device and have not saved your recovery phrase (or printed backup shares), your wallet cannot be recovered. Always back up using at least one of the methods described in the Backup & Recovery section.

What is the difference between a recovery phrase and backup shares?

A recovery phrase is a single set of 12 words that can fully restore your wallet. Backup shares split your key into three pieces using Shamir's Secret Sharing — you need any two of the three to recover. Shares are useful when you want to distribute backups across multiple locations so that no single compromised location exposes your wallet.

Can websites take money from my wallet without permission?

No. Every spending request triggers a permission sheet that shows the exact amount and the requesting domain. You must explicitly tap Authorize before any funds leave your wallet.

Does BSV Association have access to my keys or browsing data?

No. BSV Browser does not collect or transmit your browsing history, wallet keys, or personal data to BSV Association or any other party. Everything stays on your device. See the Privacy Policy for details.

What is a recovery phrase?

A recovery phrase (also called a seed phrase or mnemonic) is a set of 12 words generated when you create your wallet. These words can be used to restore your wallet on any compatible device. Keep them secret and stored safely offline.

What is the BRC-100 standard?

BRC-100 is the BSV Wallet Interface standard. It defines how web applications communicate with wallets. BSV Browser implements all 28 methods of the standard, enabling any compliant web application to request payments, signatures, encryption, certificates, and more — always with your consent.

Is BSV Browser available on desktop?

Yes. A desktop version is available at desktop.bsvb.tech.

Free & Open Source

Software that holds your keys should be software you can inspect. Every line of BSV Browser is publicly available — read it, audit it, or contribute to it.

Licensed under the Open BSV License and developed in the open on GitHub.

View the source code on GitHub →

Open BSV License

Still Stuck?

Can't find the answer above? Reach out directly — we read every message.

Email Us

Questions about your wallet, a bug you hit, or anything else — send an email and the team will get back to you.

support@bsvassociation.org
🛠

Report a Bug or Request a Feature

BSV Browser is open source. File an issue on GitHub and your feedback goes straight to the developers building the next release.

Open an issue on GitHub →